Raspberry Pi default username/password no longer automatically work with the a fresh install of the latest OS. Here is how to set up your Pi with the latest OS
The Raspberry Pi foundation recently launched an update to the Raspberry Pi OS which changes how you need to setup your Pi for the first time. Until now, the Raspberry Pi OS has had a default user called "pi", which is no longer the case for fresh OS installs. Having a default username and password has caused some worry about potential brute-force attacks and some countries are introducing legislation to forbid any Internet-connected device from having default login credentials.
Table of Contents
- The New Setup
- Headless Setup
- Updating to the Latest Version of Raspberry Pi OS
The New Setup
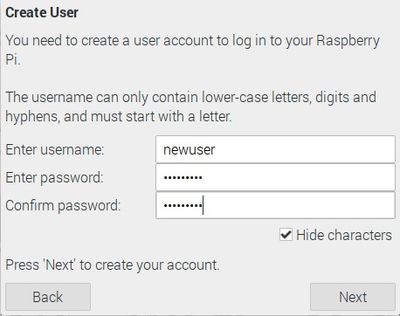
Many people familiar with Raspberry Pis are also familiar with the setup wizard, which runs when you turn on your Pi for the first time. It helps you to configure localization settings, connect to Wi-Fi and install latest software updates. However, using the setup wizard has always been optional since it used to be possible to just press "Cancel" on the first page.

From now on the wizard is no longer optional. This is because the default user "pi" no longer exists and a user must be created before the OS can be used. Once you've gone through the new setup wizard, everything will work just like before.
Using Raspberry Pi OS Lite
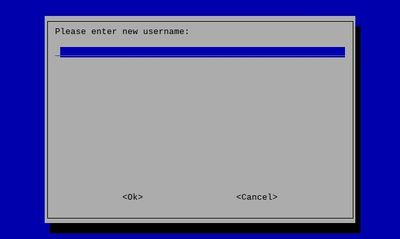
If you're using the Raspberry Pi OS Lite which doesn't come with a desktop environment. You will not see the setup wizard but you will still need to create a new user account. Thankfully, this is just as easy. During the setup process, you will be prompted to create a new account. The only difference is that the creation wizard looks more crude.

Headless Setup
If you prefer to setup your Raspberry Pi headlessly, i.e without using a monitor, the above instructions won't work. You have two options to create a user headlessly: 1) Using the Raspberry Pi Imager 2) Adding a userconf.txt file to the boot partition of your SD card
Using the Official Imager
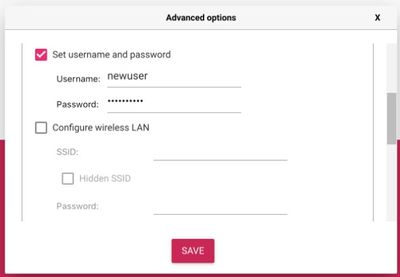
If you're using the official Raspberry Pi Imager, update to its latest version. After selecting a source image and your SD card, you can click on a new "Settings" button which has a familiar gear icon on it. This allows you to preconfigure a user to the OS image you're about to write onto your SD card. Once you've done this, the headless setup process works just like before.

Using Third Party Imagers
If you prefer to use a third party imager, like Balena Etcher, you will have to create a user by adding a configuration file to the boot partition of your SD card.
After writing the image to your SD card, open the SD card with your favourite file explorer and create a file called userconf.txt. This file should only have one line of text consisting of the username you want, followed by a colon, followed by your password in an encrypted form: username:encrypted-password
The easiest way to encrypt your password is to use OpenSSL which comes with any Raspberry Pi. You can also install it on any Windows, MacOS or Linux computer.
echo 'somepassword' | openssl passwd -6 -stdin
This will give you a string of what seems like random characters but it's actually an encrypted version of your password:
$6$3W.W.SfEPF3Q9O06$5ehg8sV1pon6rXcwYxUxhD4hrRicFYhruOc1iDEEa0VabH6QndYakRakZRXt.8c3KUyIutfaPCVMtbjyTlAsw1
Copy this string of text to the file you created like so:
myusername:$6$3W.W.SfEPF3Q9O06$5ehg8sV1pon6rXcwYxUxhD4hrRicFYhruOc1iDEEa0VabH6QndYakRakZRXt.8c3KUyIutfaPCVMtbjyTlAsw1
After this, all you need to do is to put your SD card into your Pi and you'll be up and running.
Updating to the Latest Version of Raspberry Pi OS
For new installs using the official Imager, the app will automatically get the latest version and write it to your SD card.
For third party imagers, you can download the latest version from Raspberry Pi foundation's download page
If you want to update an existing image, run the following commands:
sudo apt update
sudo apt full-upgrade
That's it. I hope I saved you from some headache with setting up your Pi after most of the online tutorials have become outdated.